6面に分離されたキューブマップテクスチャをファイル出力したい (スクリプト)
WebGLなどでHDRを使ったIBL用の映り込みや背景の表示を行う場合、
6面の分離されたキューブマップテクスチャを使用します。
別途、WebGLのフレームワークによってはパノラマの1枚の画像を使用してShaderで表現する手段もあります。
ここではスクリプトを使用し、
カメラを中心にバーティカルクロス形式でレンダリングした後に
そのテクスチャより6枚分のキューブマップテクスチャをファイル出力します。
以下のスクリプトを実行すると、
カメラを中心にレンダリングが行われます。
このとき、元のレンダリングサイズとレンダリングイメージは上書きされるためご注意くださいませ。
レンダリング後、指定のフォルダにキューブマップテクスチャに展開されたイメージが出力されます。
scene = xshade.scene()

# ------------------------------------------------------------.
# レンダリングを行う.
# 左右上下1ピクセルごとのマージンを設けてレンダリング.
# @param[in] cubeSize  キューブマップのサイズ (512, 1024 など).
# ------------------------------------------------------------.
def doRendering (cubeSize):
    # レンダリングサイズ.
    renderWidth  = (cubeSize + 2) * 3
    renderHeight = (cubeSize + 2) * 4
    scene.rendering.image_size = [renderWidth, renderHeight]

    # バーティカルクロスのパノラマ投影.
    scene.rendering.panorama_projection = 5

    # レンダリング.
    # レンダリングが完了するまで待つ.
    scene.rendering.render()

# ------------------------------------------------------------.
# 指定の名前のマスターイメージを取得.
# ------------------------------------------------------------.
def findMasterImageByName (nameStr):
    # マスターイメージパートを取得.
    shape = scene.shape
    masterImagePart = None
    if shape.has_son:
        s = shape.son
        while s.has_bro:
            s = s.bro
            if s.type == 2 and s.part_type == 102:  # マスターイメージパート.
                masterImagePart = s
                break

    if masterImagePart == None or masterImagePart.has_son == False:
        return None

    # マスターイメージ内で指定の名称があるか.
    targetShape = None
    s = masterImagePart.son
    while s.has_bro:
        s = s.bro
        if s.name == nameStr:
            targetShape = s
            break

    return targetShape

# ------------------------------------------------------------.
# キューブマップレンダリング結果を6つのマスターイメージとして分離.
# @param[in] outputPath         ファイルにキューブマップ画像を出力する場合のパス.
# @param[in] outputFileType     ファイル拡張子.
# ------------------------------------------------------------.
def createCubeTextures (outputPath, outputFileType):
    if scene.rendering.image == None or scene.rendering.image.has_image == False:
        return

    width  = scene.rendering.image.size[0]
    height = scene.rendering.image.size[1]
    orgTexWidth  = width / 3
    orgTexHeight = height / 4
    cubeTexWidth  = orgTexWidth - 2
    cubeTexHeight = orgTexHeight - 2

    cubeTexName = ['cubeTex_px','cubeTex_nx','cubeTex_py','cubeTex_ny','cubeTex_pz','cubeTex_nz']
    cubePosA = [ (orgTexWidth * 2, orgTexHeight), (0, orgTexHeight),
                 (orgTexWidth, 0), (orgTexWidth, orgTexHeight * 2),
                 (orgTexWidth, orgTexHeight * 3), (orgTexWidth, orgTexHeight) ]

    # 色補正を行うか.
    useColorCorrection = False
    if outputFileType != 'exr':
        useColorCorrection = True

    for i in range(6):
        xPos = cubePosA[i][0] + 1
        yPos = cubePosA[i][1] + 1

        # cubeTexName[i]の名前のマスターイメージが存在するか.
        masterImage = findMasterImageByName(cubeTexName[i])
        if masterImage == None:
            masterImage = scene.create_master_image(cubeTexName[i])

        masterImage.image = xshade.create_image((cubeTexWidth, cubeTexHeight), 128)

        for y in range(cubeTexHeight):
            for x in range(cubeTexWidth):
                # レンダリング画像上のピクセル色を取得.
                if i == 4:      # pzの場合は左右と上下を逆にする.
                    col = scene.rendering.image.get_pixel_rgba(cubeTexWidth + xPos - x, cubeTexHeight + yPos - y)
                else:
                    col = scene.rendering.image.get_pixel_rgba(x + xPos, y + yPos)

                # 色補正を行う.
                col2 = col
                if useColorCorrection:
                    col2 = scene.correction.correct([col[0], col[1], col[2]])

                # 色をmasterImage.imageに指定.
                masterImage.image.set_pixel_rgba(x, y, [col2[0], col2[1], col2[2], col[3]])

        # ファイル出力.
        if outputPath != '':
            fName = outputPath + '/' + cubeTexName[i] + '.' + outputFileType
            masterImage.image.save(fName)

# ----------------------------------------------------------.

# ダイアログボックスの作成.
dlg = xshade.create_dialog_with_uuid('51cbd867-c363-47f9-9741-7afa5a4e48ed')

cubeTexSize_id = dlg.append_selection('キューブマップサイズ : /256/512/1024/2048/4096', '')
outputImageFile_id = dlg.append_bool('イメージをファイル出力')
outputFilePath_id = dlg.append_path('出力フォルダ : ')
outputFileType_id = dlg.append_selection('出力イメージ形式 : /jpg/png/exr', '')

# デフォルトボタンを追加.
dlg.append_default_button()

# 値を指定.
dlg.set_value(cubeTexSize_id, 1)
dlg.set_value(outputImageFile_id, True)
dlg.set_value(outputFileType_id, 0)

# デフォルト値を指定.
dlg.set_default_value(cubeTexSize_id, 1)
dlg.set_default_value(outputImageFile_id, True)
dlg.set_default_value(outputFileType_id, 0)

# ダイアログボックスを表示.
if dlg.ask('キューブマップテクスチャを出力'):
    # ダイアログボックスでの値を取得.
    tSizeA = [256, 512, 1024, 2048, 4096]
    cubeTexSize = tSizeA[dlg.get_value(cubeTexSize_id)]

    outputImageFile = dlg.get_value(outputImageFile_id)

    fTypeA = ['jpg', 'png', 'exr']
    outputFileType = fTypeA[dlg.get_value(outputFileType_id)]

    outputPath = dlg.get_value(outputFilePath_id)
    if outputImageFile == False:
        outputPath = ''

    if outputImageFile and outputPath == '':
        print 'キューブマップテクスチャを出力するパスを指定してください。'
    else:
        # キューブマップレンダリングを行う.
        doRendering(cubeTexSize)

        # キューブマップレンダリング結果を6つのマスターイメージとして分離.
        createCubeTextures(outputPath, outputFileType)

        print 'キューブマップテクスチャを出力しました。'
        if outputPath != '':
            print 'キューブマップテクスチャを [' + outputPath + '] に出力しました。'
使い方
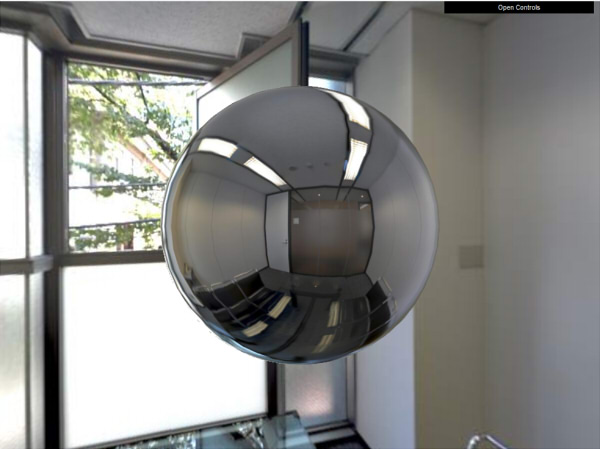
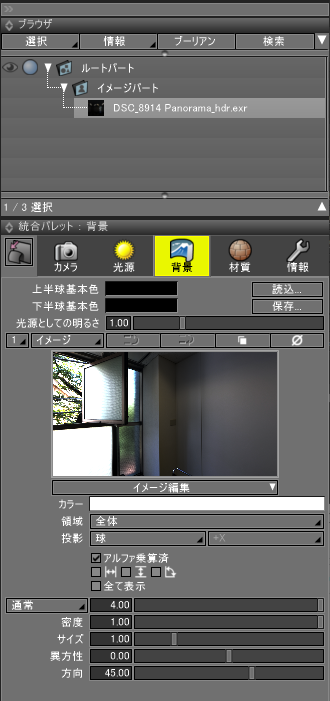
あらかじめ背景とするイメージや形状をシーンに配置します。
上記のスクリプトをコピーし、Shade3Dのスクリプトウィンドウにペーストします。
実行すると以下のようなダイアログボックスが表示されます。
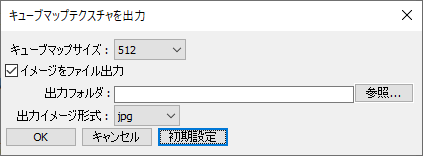
「キューブマップサイズ」は、出力するキューブマップの解像度です。
256/512/1024/2048/4096から選択できます。
「イメージをファイル出力」チェックボックスをオンにすると、指定のフォルダにキューブマップテクスチャを出力します。
オフにすると、マスターイメージとしてシーンにキューブマップテクスチャが保持されるだけになります。
「出力フォルダ」の「参照」ボタンを押し、キューブマップテクスチャを出力するフォルダを指定します。
「出力イメージ形式」は、jpg/png/exrから選択できます。
jpg/png形式で出力する場合は色補正が反映されます。exrの場合は、そのままのレンダリング色が反映されます。
「OK」ボタンを押すと、
レンダリングとキューブマップテクスチャのマスターイメージ展開、ファイル出力が行われます。
これはキューブマップサイズが大きい場合は時間がかかります。
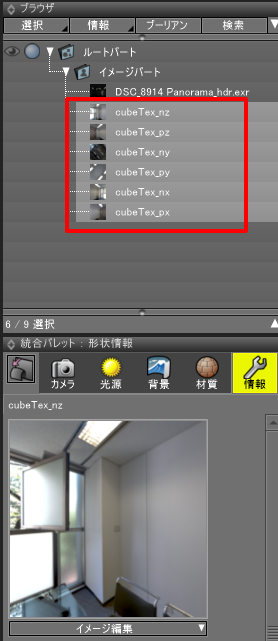
マスターイメージは以下のようにイメージパートに展開されます。
「イメージをファイル出力」チェックボックスをオンにしている場合、以下のように指定のフォルダにファイルが出力されます。
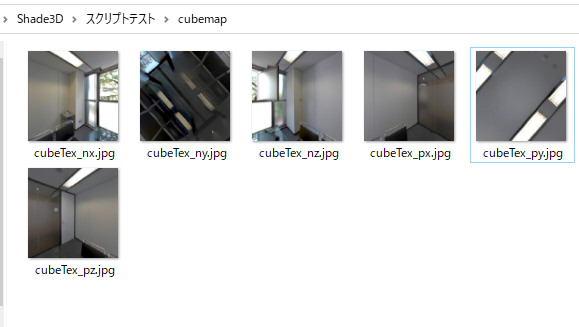
出力されたキューブマップテクスチャの名前
6枚のテクスチャは以下のような内容になっています。
| 出力名 | 説明 |
|---|---|
| cubeTex_nx | -X |
| cubeTex_px | +X | cubeTex_ny | -Y |
| cubeTex_py | +Y | cubeTex_nz | -Z |
| cubeTex_pz | +Z |
出力するキューブマップサイズの注意事項
Shade3Dのグレードにより、レンダリングできる解像度の上限が異なります。
レンダリング画像サイズの最大がBasicは2500 x 2500、Standardは4500 x 4500、Professionalは22528 x 22528となります。
そのため、このキューブマップ出力スクリプトを使ったときのキューブマップサイズは
Basic版では最大512、Standard版では最大1024、となります。
Professional版の場合は4096も指定可能です。
キューブマップの場合は6面で構成されるため、1024を指定した場合は4K解像度の背景(1024 x 4で周囲ぐるっと360度分)に相当します。
WebGL(three.js)で使用する場合
出力されたキューブマップテクスチャをWebGLで使用する場合は、環境によっては少し調整が必要になります。
three.js ( https://threejs.org/ )で使用する場合は、
キューブマップのnzとpzは逆にするようにしてください。
以下はWebGL(three.js)でのブラウザでの表示例です。